Monday 5 May 2014

The Day Before Hand-In Reflection

In this project I have faced a few problems but have been able to overcome all of them, I have learnt a lot of new skills and how to do different things on UDK and 3D Studio Max. Overall I have enjoyed this project but felt that it was a bit too long near the end and started to get a bit fed up of it! Thankfully I had chosen a topic that I have always been interested in, so even in my breaks from work I was watching films and tv dramas that were set in manor houses so could be classed as research.

This project has literally taken over my life for the past few months, resulting in me rarely leaving the house, so I think that after I have handed this in (and celebrated with my classmates) I will be living in the gym, but my main focus will be finding a job! I have already been working on my CV, covering letter and portfolio website to build more of a professional image, but I will put a lot more focus into these and finding a job will be my job for the moment.

I am really looking forward to my upcoming graduation, I am very hopeful that I will get a good degree at the end of this because I feel that I have learnt a massive amount in such a small amount of time. Considering that before I joined this course, I had never touched a 3D program and had very limited Photoshop skills, I feel that what I can create now is actually unbelievable and has definitely made me grow as a person. Initially I never wanted to go to university but after contacting a few games companies, and realising that making games wasn’t just a job that you could learn from shadowing someone in the industry, or having a few weeks of unpaid tea making, I hesitantly joined university not knowing how much there was to be learnt. (Also the prospect of the raised uni fees pushed me in the right direction!)
At the end of this course I am happy that I came to university, I have learnt so many new skills and more about the games industry, also living away from my parents home for a few years has made me more of an adult, and made my confidence grow.


I have gone from a shy and lonely teenager with a few art skills, to a determined, hard-working and industry minded adult with a great knowledge of building 3D games and I cannot wait to get a job!

References Used Throughout This Project

Manors Visited:
Highclere Castle – Newbury, England
Wollaton Hall – Nottingham, England
Windsor Castle – Windsor , England
Greenway House – Devon, England
Catherine Palace – St. Petersburg, Russia
Hermitage Museum – St. Petersburg, Russia

Books Read:
Blenheim Palace Guide Book
Althorp House Guide Book
Wollaton Hall and the Willoughby Family - Pamela Marshall
Castles and Houses

Websites Used:
General 3D and UDK Help: http://www.digitaltutors.com
Various Forum Discussions: www.polycount.com
Various Forum Discussions: http://forums.epicgames.com
Royalty Free sounds: soundbible.com
Soundjay.com
Freeplaymusic.com
Convert mp3 sounds to wav: http://media.io/

Media Watched:
Pride and Prejudice (Film)
Death Comes to Pemberly (TV Drama)
Downton Abbey (TV Drama)
Poirot (TV Drama)
Mr.Selfridge (TV Drama)

Friday 2 May 2014

Final Major Project [Post 15] ~ Final Test Before Hand-in

It is the Friday before I have to hand in my project so I decided to travel to Leicester to test if my level works on the University computers. Thankfully it has worked perfectly so the only things I have to do now is create my fly-through, get some professional looking print-screens and burn my disc ready for hand-in. I will be glad to see the back of this project but I have actually really enjoyed it and I'm actually surprised with the amount that I have achieved on my own. 
I'm definitely glad that I chose to create an environment about a subject that I was interested in, as it has made the project a lot more enjoyable. I can't wait to hand this in and post this onto my portfolio, I am proud of it and want to show it off!

Final Major Project [Post 14] ~ Smashed Windows and Ridiculously Large Cushions

I finally got round to creating the smashed window in the hall, (to signify the player has broken in) it was simple enough to do but to add a bit more atmosphere I decided to put some rain outside. Instead of using a particle effect that I am quite familiar with, I created this rain on an animated material to teach myself something new. I was really pleased with the outcome and feel that it makes the windows themselves more interesting and draws more attention to the smash. 

I had the usual problems with the fact that the rain used alpha and so was impossible to actually select in the normal UDK view, and because I have a lot of assets in my level now, its quite difficult to distinguish in wire frame view.

I had a slight problem with UDK itself at this point, because I'm not very familiar with actually building things in the engine as I generally just import my own assets that I have built in 3DS Max. Unlike every single program that I have used in the past, UDK doesn't recognise Ctrl+A as Select All, and instead drops whatever material you have selected down on where the UDK box is. Unknown to me, I tried selecting my level by pressing Ctrl+A, it didn't work so I thought it didn't actually do anything, turns out I had actually made it rain in my dining room! After a lot of frustration to figure out how to get rid of said rain, I realise this was actually quite funny and at least I know how to fix this in the future if I accidentally try and use short cut keys. 
Other than just general re-texturing of things and adding some more stealable assets, I don't really have much to write about, I am really just doing the finishing touches to my level. I have finished most things and am very happy with what I have made. 
On another note, when I imported my re-textured cushions they were bigger than the chairs, which made no sense whatsoever, I re-imported them again and they were the correct size. I think I may have found a problem with either exporting from 3D Studio Max or importing into UDK. 

 What?

Monday 28 April 2014

Final Major Project [Post 13] ~ Pretty Glowy Things

 This week I have mainly just been finishing off everything and making sure everything looks good, I redid the walls in the hall to be more efficient, and made a new texture for the lower part of the walls. Every time I looked at the brickwork on the hall walls I just felt that it never really looked right, I was happy with the normal and specular but not the diffuse. I painted over my diffuse to make it less saturated and more of a brown colour rather than grey. This has made the room feel a lot warmer in my opinion and it compliments the new wallpaper in the seated area quite nicely. I am quite happy with this room now, but I feel that maybe it needs more things in it to make it less empty. 

I have been researching a lot about animating a glowy material for my logs and embers in the fireplaces and I finally found a solution. Most of the techniques I found previously, required a matinee animation and I thought that there must be a different way to do this, as I have seen animated materials before, but have never known how to create them. I want to prove that I can do other things, I already have a lot of matinee animations, and I want to learn new things. I finally figured out how to get the look I wanted without using matinee, but instead using sine nodes. It doesn't look exactly right, as all of the glowing is pulsating at the same time, but I am happy with it for the moment. If I have some extra time after completing everything else I want to do, I will look more into this. 


One of the big important things in my level is the stained glass window, projecting moonlight into the hall. I wrote about this on my project brief but couldn't get it to look right until now. I originally tried using a light that projected the stained glass texture onto the floor using the light function setting, this didn't look right at all and looked more like I had just put a decal on the floor. So I thought about it in a completely different way, instead all that I have done is made the window itself emissive, and put 3 lights, in each primary colour coming from the window with light shafts enabled. This has made a lovely and dramatic effect on the window and I am really happy with it.

I don't have a lot more to do in my level now, I literally just have a very small list of things to tidy up, I am very glad of this as I am tired of my level and just want to hand it in! I have bought some CD stickers and I'm actually quite excited to print out a nice design, stick it to a disc and burn all of my level onto the disc, I am quite proud of what I've achieved.

Friday 18 April 2014

Final Major Project [Post 12] ~ Redesigned Rooms and Scary Portraits

Here is a video showing what my level currently looks like, it shows the working doors, new library key actions and more stealable things.

As I briefly mentioned in one of my past posts, I have been moving assets about to create more interesting layouts, the most noticeable are the sitting room and the library. I have added more chairs and rugs to the sitting room to make it more cosy and less empty feeling, I would like to experiment with the chairs some more to make them look more impressive, maybe play around with some normal maps. I have recently picked up a copy of NDO2 so this might be a good program to use for this sort of thing, but we shall see as I have never used it before. I will also add some mirrors to the walls in the sitting room as manor houses often did this to make the rooms look bigger. 


In the library I put more focus into the seating area, adding a chaise longue and moving some of the bookcases around. I changed some of the colours of the books as well to add more diversity. I don't think that there is much more to do in the library, I am quite happy with it as it is. Of course I have to work on the fireplace, but this is the case with all of the rooms and I will probably just reuse the same fireplace interior, I would like it to be filled with glowing embers/logs.
The study area just needs a few little tweaks, like I feel that the desk is too high, the bust should be somewhere else, but other than that and the addition of some paintings and a war newspaper, this area will be finished. I am very happy with the fretwork on the room dividers, it is only a simple alpha texture, but I feel that it gives more of a finished look to the room.

I worked a lot on the interior of the treasure room, I had previously ignored this room and concentrated more on the other rooms, but this is the finale of the level so it needed some work. I have reused a lot of the stealable assets that were dotted around the level, as a hint that "this is what you could have stolen" incase the player missed anything. 
This room is supposed to look very cluttered and abandoned, like the treasures have just been thrown in there and forgotten over the years. I might have a congratulations message come up on the screen when the player enters and maybe a twinkly treasure noise. However I think I mainly need to look at the colour scheme/lighting in this room as it is very bright and "in your face"!

I was a little concerned about the paintings throughout my level, currently I only have finished paintings in the dining room, and 2 paintings in the hall. Because of this I begrudgingly took some photos of myself dressed up and Photoshopped them to look less like me and more like paintings, I don't think that this is cheating as they are my own photos, I haven't taken them from the internet and I am admitting here that I didn't paint them myself. 
I did this to save time as my digital painting skills aren't great and it would have taken me days to properly paint a portrait from scratch, let alone a few portraits as I am not very quick with painting. 

Thursday 17 April 2014

Final Major Project [Post 11] ~ Working Locks and Melting Brains

I finally found a way to get my library door/key to work correctly, it took a lot of researching and random testing but it finally has the desired effect! Now the player can approach the library door, it wont open but will display [Door Locked] on screen, until the player gets the key. The key is in one of the drawers in the dining room that open when you get near. I had a problem here with the key in the drawer, if the player didn’t pick up the key once the drawer had been open and then closed again, the key would stay floating and clipping through the front of the drawer. I tried a few ways of fixing this but the more I did to it, the worse it got (key was now reappearing and floating in place when player had collected key, secondary key would not go away.) So I took a small break, watched a brain-melting episode of Jeremy Kyle and then came back to the problem, for some reason I managed to fix it straight away, its like all of a sudden it made sense to me.

It is very important to take breaks, I have always prided myself on my ability to not get overly stressed or weighed down with work and to take regular breaks, but recently I haven’t been doing this and my sanity is suffering because of it! Atleast I have realised now, so I can fix this problem with myself and have regular breaks!
In a way I am glad that I have come across UDK and Kismet problems at this stage in the project as once I fix them, I feel a sense of achievement and I still have a few weeks left so I’m not rushing or trying to find an easy fix, I’m taking my time and learning a great amount at the same time. I will admit that I am getting a bit stressed with my project but I think that’s only because I have done all of my building which is the main thing that I enjoy, so I’m feeling a bit fed up with this project now as I have to do more of the things I don’t enjoy so much. I feel like it’s too much time to be spending on one project, I would rather do smaller projects with less time and I even have a few ideas for other things I want to do, but I feel if I start other projects I will be cheating this one and this one is ultimately more important. So yes, I am getting fed up but at the same time I feel pressured to create an absolutely fantastic level as literally my whole degree rests on this project and that is very scary!

On another note, I keep getting a weird warning that shows every time I build the lighting on my level, two of my assets apparently have no triangles and I am incredibly confused as they show up completely fine in the level. This is another thing that I will have to fix.

Wednesday 9 April 2014

Final Major Project [Post 10] ~ Post Presentation Feedback Fixes

I had one of my last presentations in front of my uni class the other day and I received a few pieces of feedback to help me with my level. One of the main things was that the Victorian wallpaper texture on the walls in the sitting room was too big and bold. I experimented with scaling it so that the pattern was smaller and more frequent, but it still didn’t look quite right. I had another look at my reference images and realised that most of the sitting rooms seem to be wallpapered with a simple tiling pattern or just painted a neutral colour like white or light blue. I used the plaster texture on the walls and then tried the wallpaper texture on the sofas and curtains instead. I feel that this looks much better, and with some additional paintings on the walls will provide the correct look and feel of the room.
A lot of my assets were the wrong size, such as the grandfather clock and dining room table, making the player look child size which I scarily didn’t notice before. (probably because of working on this same project for so long). I scaled them down and retextured some more of my assets; my level is really starting to come together now.

I have been experimenting with the stained glass window in the hall, but still cant get it to look right, this is an important feature of the level and is one of the first things that the player will see so it must look right. I have been moving a few of my assets around the rooms and experimenting with different layouts. I never made a final layout design for my rooms, just concepted the assets themselves and the size of the rooms. I feel that maybe I could have concepted the room layouts at the start of the project, but if I had done that then I would have just stuck with one layout and it may not have ended up looking very good. Atleast now that I have built and textured all of the assets (to the correct scale) that are supposed to be in each room, I can find the best room layout by just moving the assets around and testing in engine. By doing this, I have already found a better layout for the sitting room and the seated area in the library.

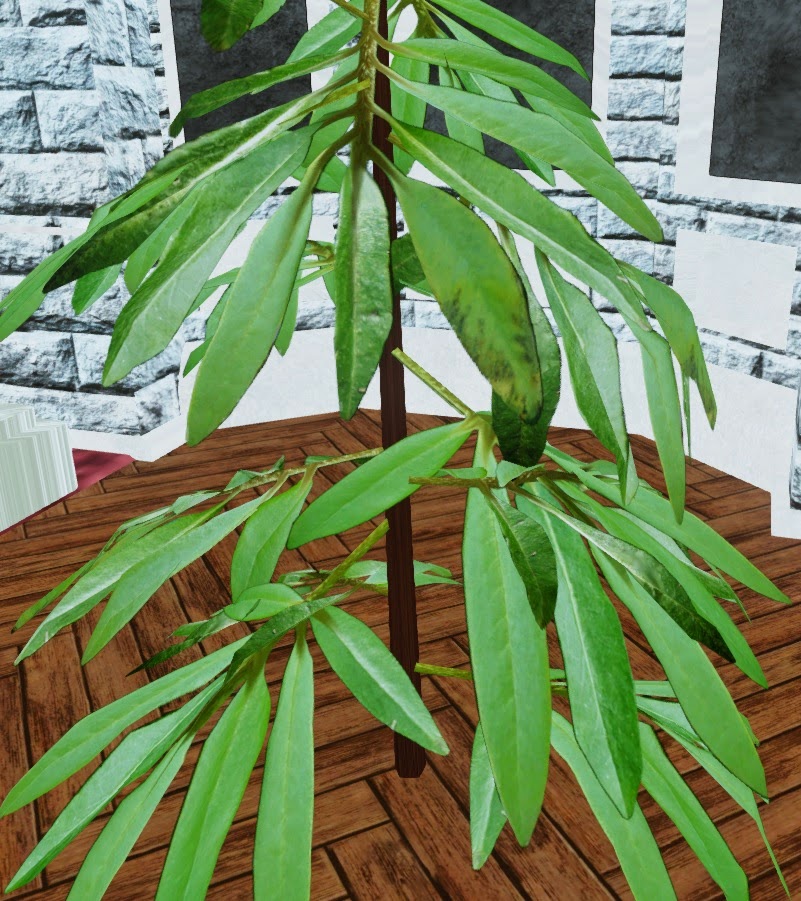
I managed to find a solution to the alpha problem that I was previously having with my plants, I had initially set the material to “BLEND_Translucent” and plugged the alpha map into the Opacity slot. However it seemed that setting the material to “BLEND_Masked” and plugging the alpha map into OpacityMask instead produced the desired effect. I’m not entirely sure why this is so different but atleast it works now, it wasn’t very difficult to solve and I know for future reference. 

Final Major Project [Post 9] ~ Quick UDK Update

Lately I have been very busy with unwrapping and texturing, I will admit that this isn’t one of my favourite things to do, but my level is gradually looking better with the more things that are textured correctly. 

I have been making the stealable assets this week also, but still would like to figure out how to make them look more obvious, like a sparkly outline around the items when the player gets close, so they know what they can and cant steal, alternatively doing this may be too cheesy and may not go with the look and feel of the level.
I have made a few potted plants to go around my level but am having problems with my alpha texture. For some reason the leaves that are behind are clipping through the leaves on the front, I am unsure how to fix this, I’m sure that it will probably just be a simple fix like a tick box but I haven’t found a solution yet. 

Tuesday 25 March 2014

Final Major Project [Post 7] ~ Lighting Update

I found a reasonably easy tutorial online that got the torch working with the desired movement by adding a light as a weapon. It does require some coding, but the tutorial supplies you with all the code needed so it isn't too bad.

I think that I will have to include a note in my files when I hand in this project to uni, instructing to put the extra file into the UDK folder, otherwise my torch will not work and the player won't be able to see anything in the level.

The code that was supplied in this tutorial created an error when I tried opening UDK, which admittedly made me panic a little at first as I have no experience with game coding. However, I read the error message and figured out for myself that one of the lines of code was on the wrong line. The message was asking me to provide a name for the new "weapon", which was on the line underneath, so I put the name on the same line of text and it then worked perfectly. I then used Kismet to attach this "weapon" to the player, and I haven't had any more problems with it since.

In the tutorial, it instructs to remove the player HUD using Kismet, but I found that when I did this, none of my additional text that appears on screen shows up, so it must be part of the HUD. Unfortunately, I don't think I can remove the HUD and have text on screen at the same time, and I feel that the additional text on screen makes my level more like a game as it instructs the player and tells them that a door is locked or that they need to find a certain item in order for something to work.

Monday 24 March 2014

Final Major Project [Post 6] ~ Engine Update

Other than creating a lot more assets for my level, I have been working a lot in UDK itself to make my game work how I would like it to. I had problems for a while trying to figure out how to get the player to “steal” items, and finding a tutorial online was proving more difficult as I didn’t know the correct term to search for. I have found over the years that if you don’t know the correct word, then you won’t find what you’re looking for. However, I figured that I was thinking about this completely the wrong way, in that I was looking for “picking up” items or “stealing” items, but really all I wanted was the item to disappear when the player activated it. Once I had figured this out, I realised that maybe the item itself didn’t need to be taken, but it needed to appear that it was gone. I then just set up a simple Kismet table with a Matinee “visibility animation” attached to a trigger on the asset.

To create the right feel to the level, I made the whole level completely dark by disabling “global illumination” I then tried tackling the problem of getting the player to emit light, like they were holding a torch. A followed a tutorial where a spot light needed to be “Hard attached” to the player’s right arm. This works completely fine in third person view, but because I have a specific time period for my game, I don’t want to be able to see the default robot player. I have set my level to first person and hidden the futuristic default gun. When in first person, the attached light moves from side to side when the player looks around, but stays stationary when looking up or down. The light moves when the player jumps, but just wont move when looking. I have asked people in class about this and the main opinion seems to be that I will have to look into coding. I have no experience with game coding, as I am doing an art course and have no idea where to start with this, so I am going to try and find a way around this or make it somewhat easier for myself.

Final Major Project [Post 5] ~ Testing in Engine

 I have put most of my untextured assets into UDK to see what they will look like as a scene and if they are the correct scale etc. I found that most things looked correct until I realised that I hadn’t changed the game mode, which was a bit of a noob mistake. Changing the game mode then meant that the player size had changed making my level look too big and adding a gun that I didn’t need. I fixed these problems by finding a few UDK console commands and then adding them to Kismet under the “level loaded” box. 
I changed the player size, the camera perspective and hid the gun. Making the secret door was easy, it’s just a simple Matinee animation, moving the bookcase asset to the side, the trigger is on a marble bust at the other end of the library. I found out that there is another Kismet function that displays any text on the screen, so when the player gets near the bust a message saying “Press E to activate” appears on screen. I would like to add an animation to the bust where the head moves backwards revealing a button, a lot like on the original Batman. I need to make the secret door and even the route of the level more obvious to the player, as I found when someone else played my level, they didn’t know where to go, as some doors open and others don’t.

Wednesday 19 February 2014

Final Major Project [Post 4] ~ Building, Building and more Building

Recently I have been like an asset making machine, I have really been enjoying sitting in front of 3D Studio Max and churning out various assets for my level. I feel like I am definitely getting a lot faster with building in 3D and I am pleased with most of the things that I have made. My level was looking very sparse but hopefully once I have put all of these assets into my level, then it will look more like a manor house. I am not really looking forward to unwrapping or texturing some of these assets though as some have very rounded parts that will be difficult to unwrap neatly. I am going to pay more attention to making my unwraps a lot neater in this project though, as I feel that has let me down in past projects, although looking at my assets now, most of them will share the same tileable textures of wood or gold.

I made a paint-over of my library, as I couldn't get the ceiling to look right, by doing my paint-over, I realised that the ceiling wasn't high enough. Library's need to be very big, grand and impressive, with a ridiculous amount of books lining all of the walls, I think that I have almost achieved this with my level now that I have fixed the ceiling, but it still needs a few more assets. I decided to put a wooden room divider over the end of the room to separate the study from the library, I feel that this adds more depth and interest to the room, rather than it just being a plain room with some books and chairs in for example.

Final Major Project [Post 3] ~ White Boxing

An important part to any level is getting the white box done correctly, so that you can plan where all of the entrances and exits are and how you would lead the player around the level. Being a manor house, the design of the level isn't too difficult, most manor houses are all about symmetry with the doors and windows, even if they don't lead anywhere and are only for decoration. I used my floor plan to help me create my white box and I will use my white box to create my walls, floors and ceilings from, I may also do paint-overs on my white box to figure out colour schemes etc, but the overall shape and layout of the rooms won't change very much from this plan.


I have recorded me building a few of my assets and put them on to YouTube: